Process imagery in ArcMap using Google Earth Pro
Google Earth desktop has two versions which are Google Earth and Google Earth Pro. The Google Earth Pro is easily useable software. It is the most convenient one to display wholly imagery of Google Earth, make imagery of GIS data, make high-precision imagery for delivery customers, make routes map, and make report. Additionally, Google Earth Pro has some advantages to maps the Earth by high-resolution satellite imagery, locate location data using KML (Keyhole Markup language) file format or download and find location [3] (Figure 4).

Save image tool
Open Google Earth Pro program, enter Search (1) window, type Mongolia or any name of provinces/Mongolia, Tuv province, search it and imagery of selected province shall be viewed or opened. Information on location /latitude, longitude and elevation/ of selected province shall be in the bottom right corner. Then, save the imagery of the selected province into JPEG imagery type (.jpg) format. Use the Zoom in tool (2), if the user wants to enlarge the imagery of the selected area (Figure 4). Several imageries of the selected area may create when using Zoom in (2) tool. In order to add a location marker, location information of four points of each selected area /province/ imagery shall be used by Add Placemark (1) tool of Google Earth Pro. Click on the right button on the selected point, open Properties (2), and the selected point location of latitude, longitude information shall be opened. In the Name (3) section of this window, give the point name and click OK (4) (Figure 5). Repeat to do this process, to add the remaining point location marker and create the point name. In addition, the latitude and longitude information at the four points of each imagery will prepare according to Figure 5 and the location information will save in Excel. If the point location marker does not create at the selected point of user, the location marker can be changed by mouse.

After making the location of the selected area /province/, save the imagery as JPEG (.jpg). To do this, give the output imagery file of the selected area and save them in JPEG (.jpg) using the Save Image (1) tool of Google Earth Pro. In addition, it is possible to select and save the Map options (Title of Description, Legend, Scale, Compass) and resolution when using the Save Image (1) tool (Figure 6).

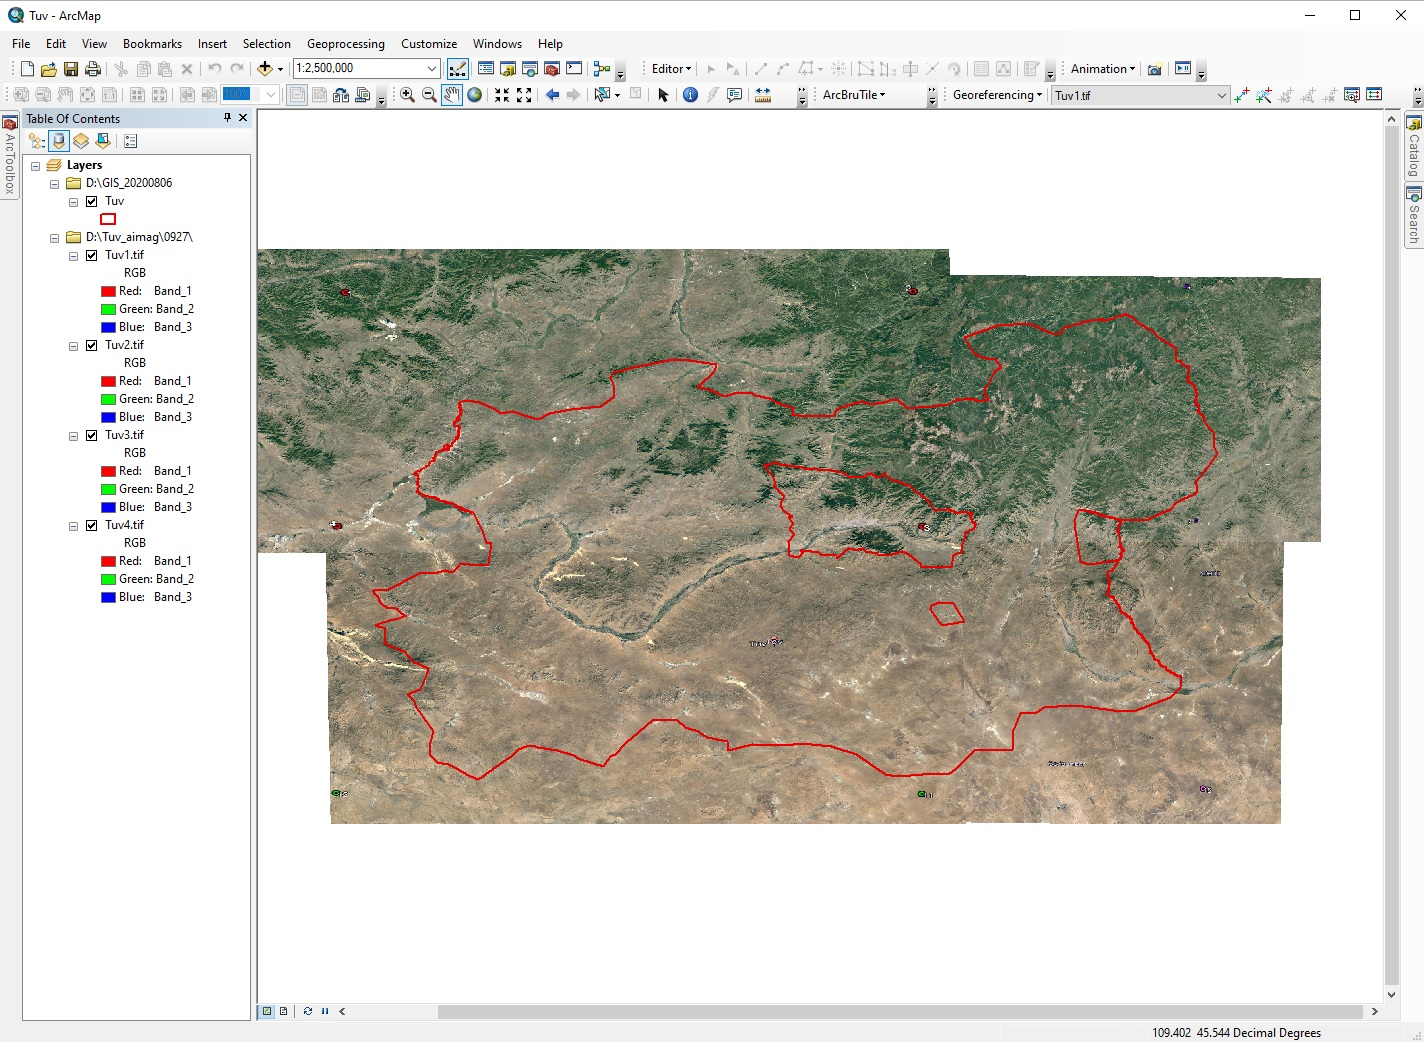
Figure 7 shows the territory of Tuv province divided into four imageries.

1.2. Create Shape file (*.shp) tool
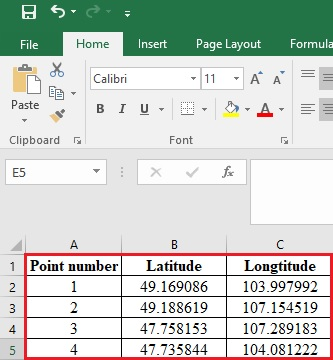
The latitude and longitude information of the imageries in the Excel file (Figure 5) will convert using the following link (https://www.fcc.gov/media/radio/dms-decimal) (Figure 8a). After the conversion by this link, copy and save the latitude and longitude information of all imageries to the Excel file. After that, the latitude and longitude information of the four points of each imagery shall be prepared according to the below form for ArcMap (Figure 8b). To save this Excel file, use the File → Save as tool in Excel, enter a file name in the File name window, and select Excel 97-2003 Workbook from the Save as type window. The output file Tuv_aimag.xls is created.

To create a shape file in ArcMap, open the Excel file (Figure 8b) using the File → Add Data → Add Data tool. Then right-click the Excel file, open the Display XY Data tool, select Geographic Coordinate Systems → World → WGS 1984 from the Edit option at the bottom right of the Description window, click OK, and a new output file will be created (Figure 9). In order to save it, click on the right button of the created an output file, select Data → Export Data and output shape file (*.shp) will be created.

Make geographical projection tool
Open the JPEG imagery (.jpg) in ArcMap and make the following settings. To do a geographical projection, right-click on the JPEG imagery (.jpg), open the Data Frame Properties → Coordinate System window, select Geographic Coordinate Systems → World → WGS 1984, and click OK. Then, user can choose one of the following two methods to convert the imagery to GeoTIFF (*.tif) or a raster image. These include:
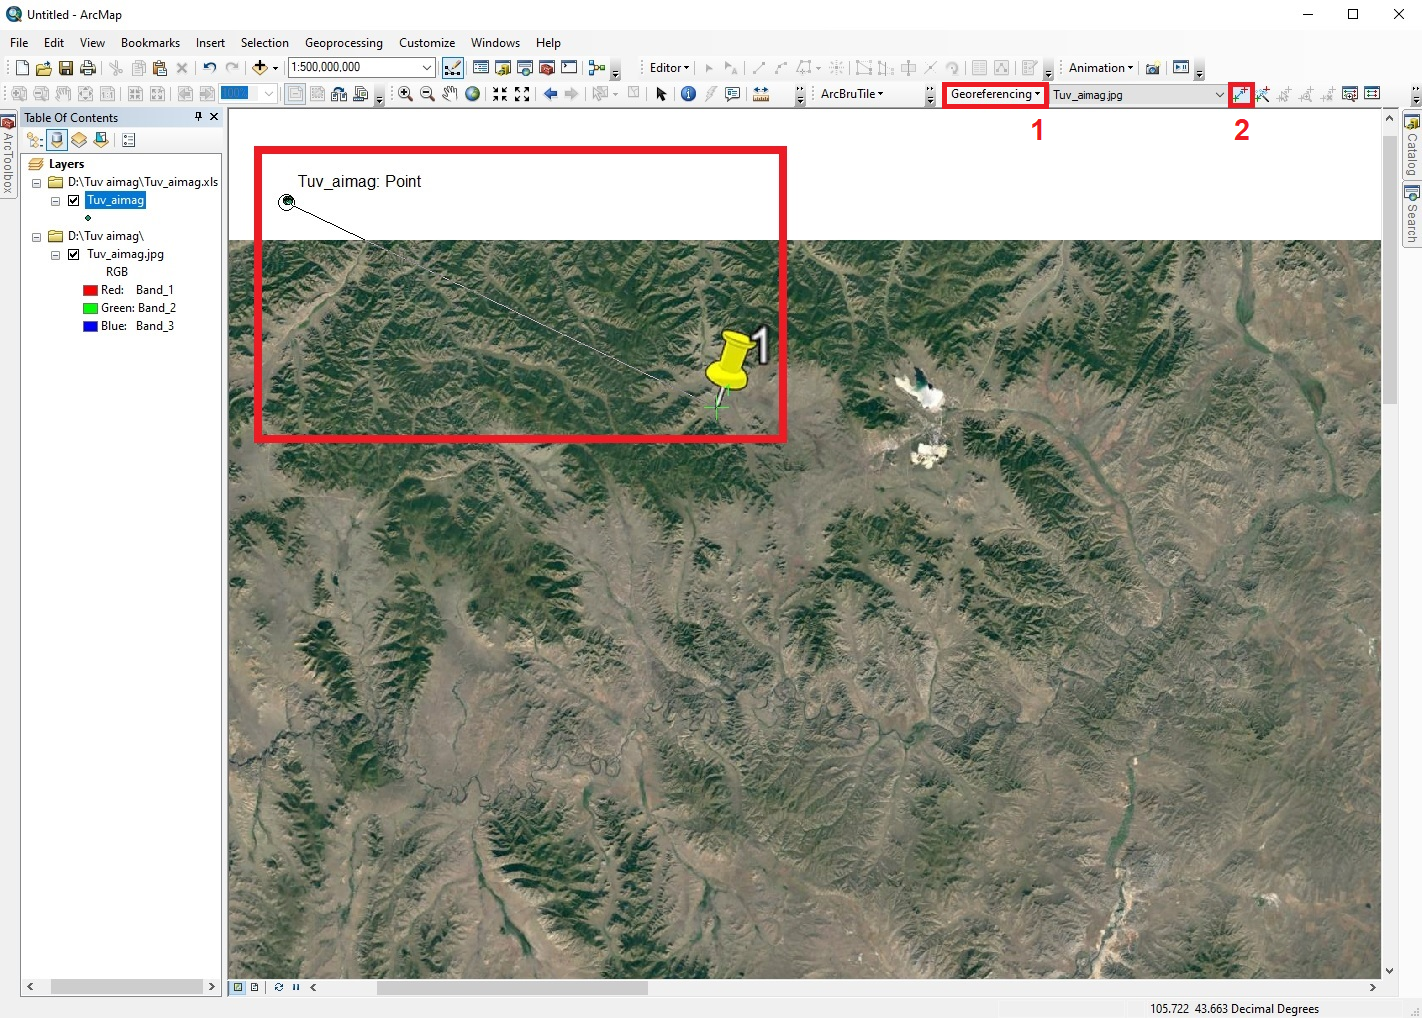
- Connect the first point of the JPEG imagery (.jpg) to the corresponding point in the shape file (.shp) using the Add Control Points (2) tool in Georeferencing (1) menu of ArcMap (Figure 10a). Because the JPEG imagery and shape file have different projection, select the first point of the JPEG imagery and right-click the Zoom To Layer of the shape file in the Table of Contents menu to connect it to first point of the shape file. The first point of the JPEG imagery and shape file overlap at same point. In this way, connect the remaining points of the other JPEG imagery and shape file (Figure 10b).
- Right-click only the first point of the JPEG imagery (*.jpg) using the Add Control Points (2) tool in Georeferencing (1) menu of ArcMap and select Input X and Y to open Enter Coordinates window where shown in Figure 6b, enter the value of the converted latitude and longitude and click OK (3) (Figure 11).

After selecting one of the above two methods, use the Georeferencing → Rectify tool to save the output file of the imagery as GeoTIFF (.tif) or raster image. The output files saved as raster images (.tif) were given name Tuv1.tif, Tuv2.tif, Tuv3.tif and Tuv4.tif, respectively (Figure 12).
Mosaic imagery tool
The raster images (Tuv1.tif, Tuv2.tif, Tuv3.tif and Tuv4.tif) merge by the mosaic tool using the Data Management Tools → Raster → Raster Dataset → Mosaic To New Raster of the ArcToolbox menu. Use this Mosaic To New Raster tool to merge the raster images (Tuv1.tif, Tuv2.tif, Tuv3.tif and Tuv4.tif) according to the procedure shown in Figure 12. These include:
- To select the Folder and save the merging raster image
- To give the new file name
- To select the geographic projection
- To select the pixel type of the imagery
- To select the number of bands
- After doing the above, click OK.
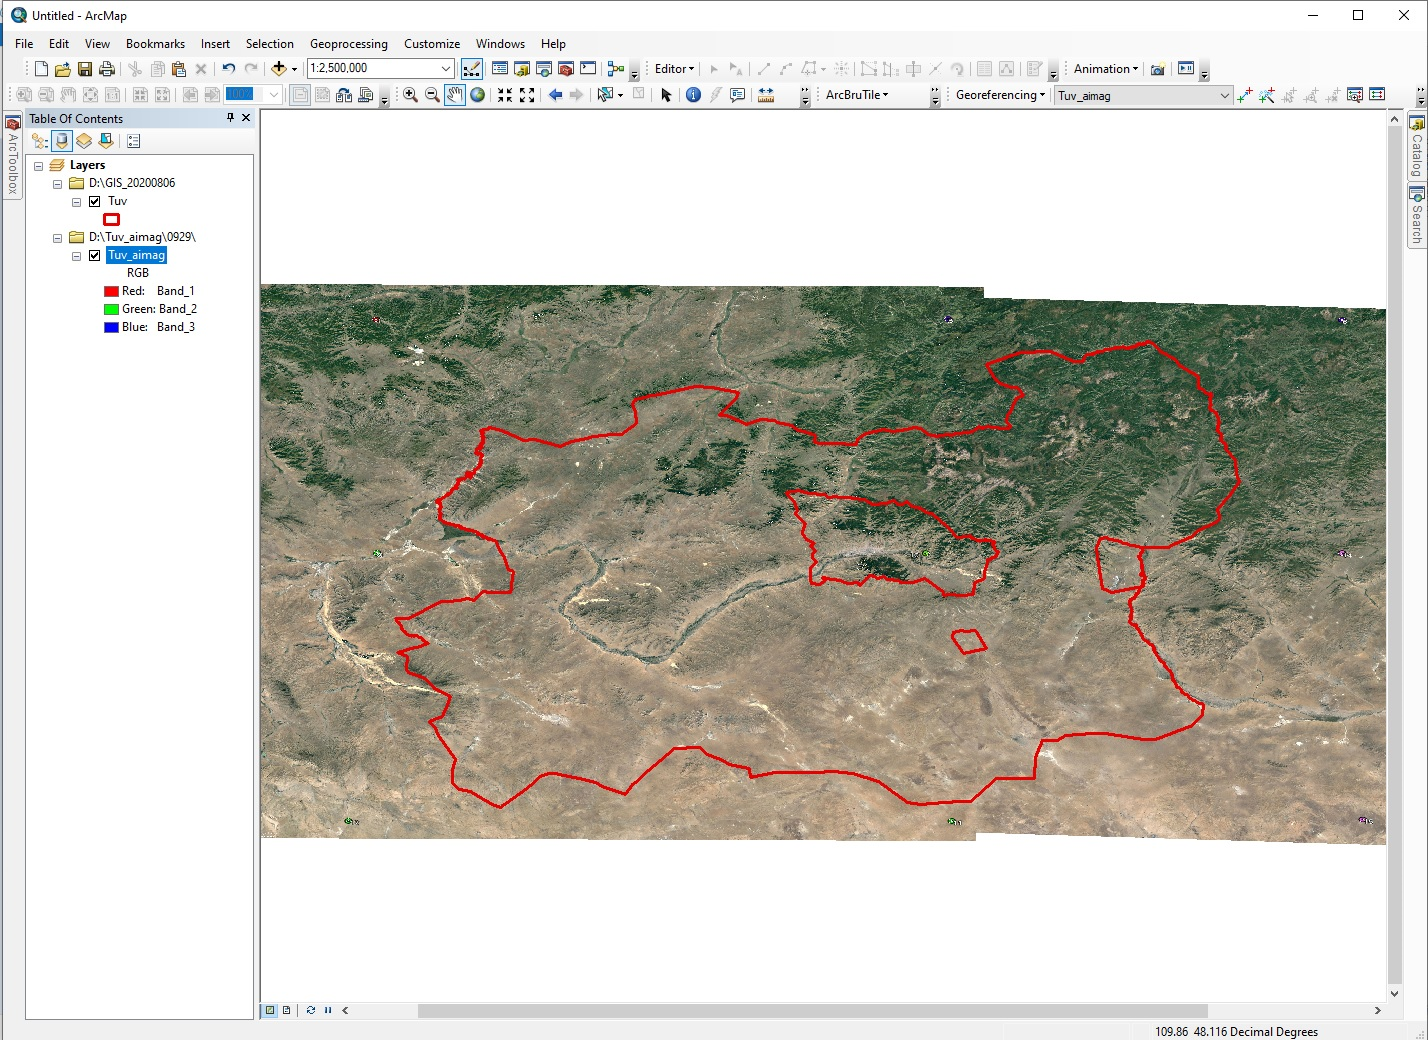
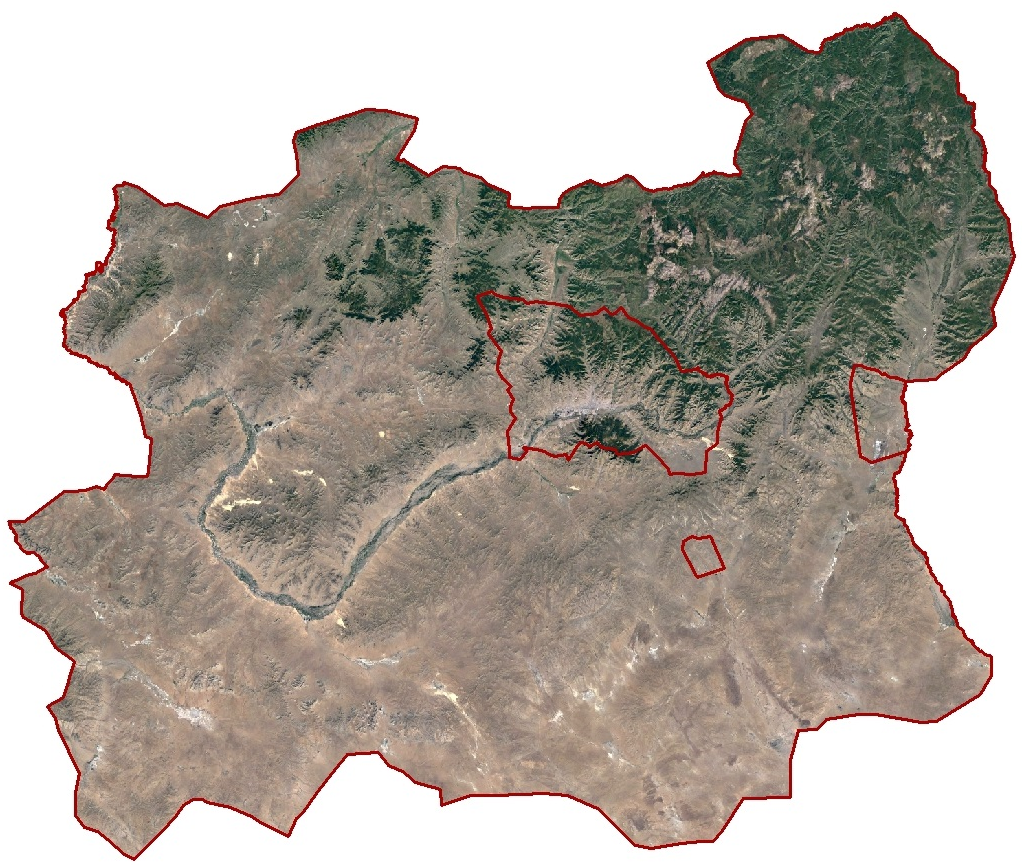
After making a mosaic, the newly created imagery will be clip the boundary of Tuv province (Figure 13a). To do this, use the Spatial Analyst Tools → Extraction → Extract by Mask tool in ArcToolbox menu of ArcMap to clip the boundary shape file (.shp) of the Tuv province. Then right-click on the clipped imagery and select None from Properties → Symbology → Stretch → Type to open the imagery in natural color. Save this raster image (.tif) to JPEG (.jpg) by selecting Export Map tool of the File menu (Figure 13b).
If the boundary shape file (.shp) of the study area does not exist, the above operation (Figure 13) is not required.

