Process imagery in ArcMap using Bing map
Bing Maps (previously Live Search Maps, Windows Live Maps, Windows Live Local, and MSN Virtual Earth) is a web mapping service provided as a part of Microsoft's Bing suite of search engines and powered by the Bing Maps for Enterprise framework [4]. Bing map has the following advantages. These include:
- Easily search the object and research site.
- Detailed information on the site is available.
Bing Maps was originally launched as MSN Virtual Earth, which was released for beta testing on July 24, 2005 [5]. It was a continuation of previous Microsoft technologies such as Microsoft MapPoint and TerraServer. Its original stands out feature was the aerial imagery [6].
On June 3, 2009, Microsoft officially rebranded Live Search Maps as Bing Maps, and the Virtual Earth platform as Bing Maps for Enterprise [4]. In 2010, Microsoft added an OpenStreetMap layer to Bing Maps [7].
From 2012, Nokia (formerly Navteq) powered many aspects of Bing Maps as an extension to its Windows Phone 7 partnership with Microsoft, including mapping data, geocoding, traffic data and navigation etc. First, user needs to install, configure and add two tools to the ArcMap program such as Bing map (Figure 2) and Add Basemap (Figure 14). These are performed as follows.
Activate the ArcBruTile tool on ArcMap
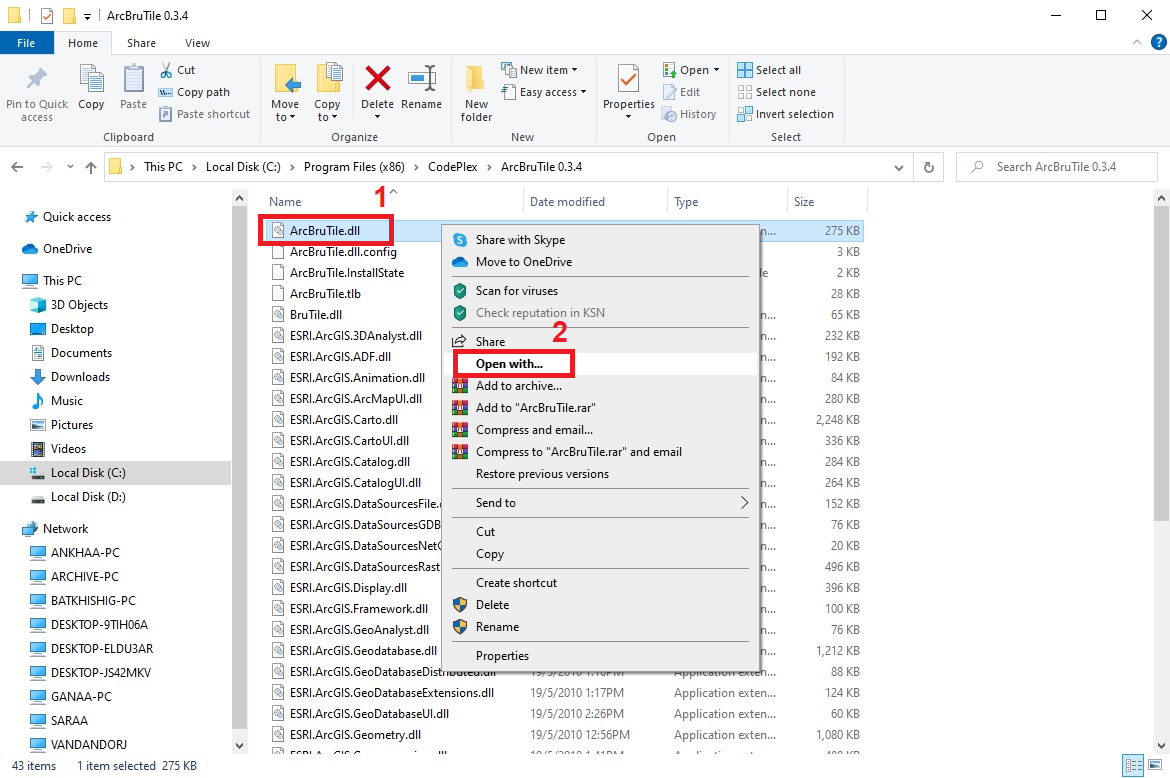
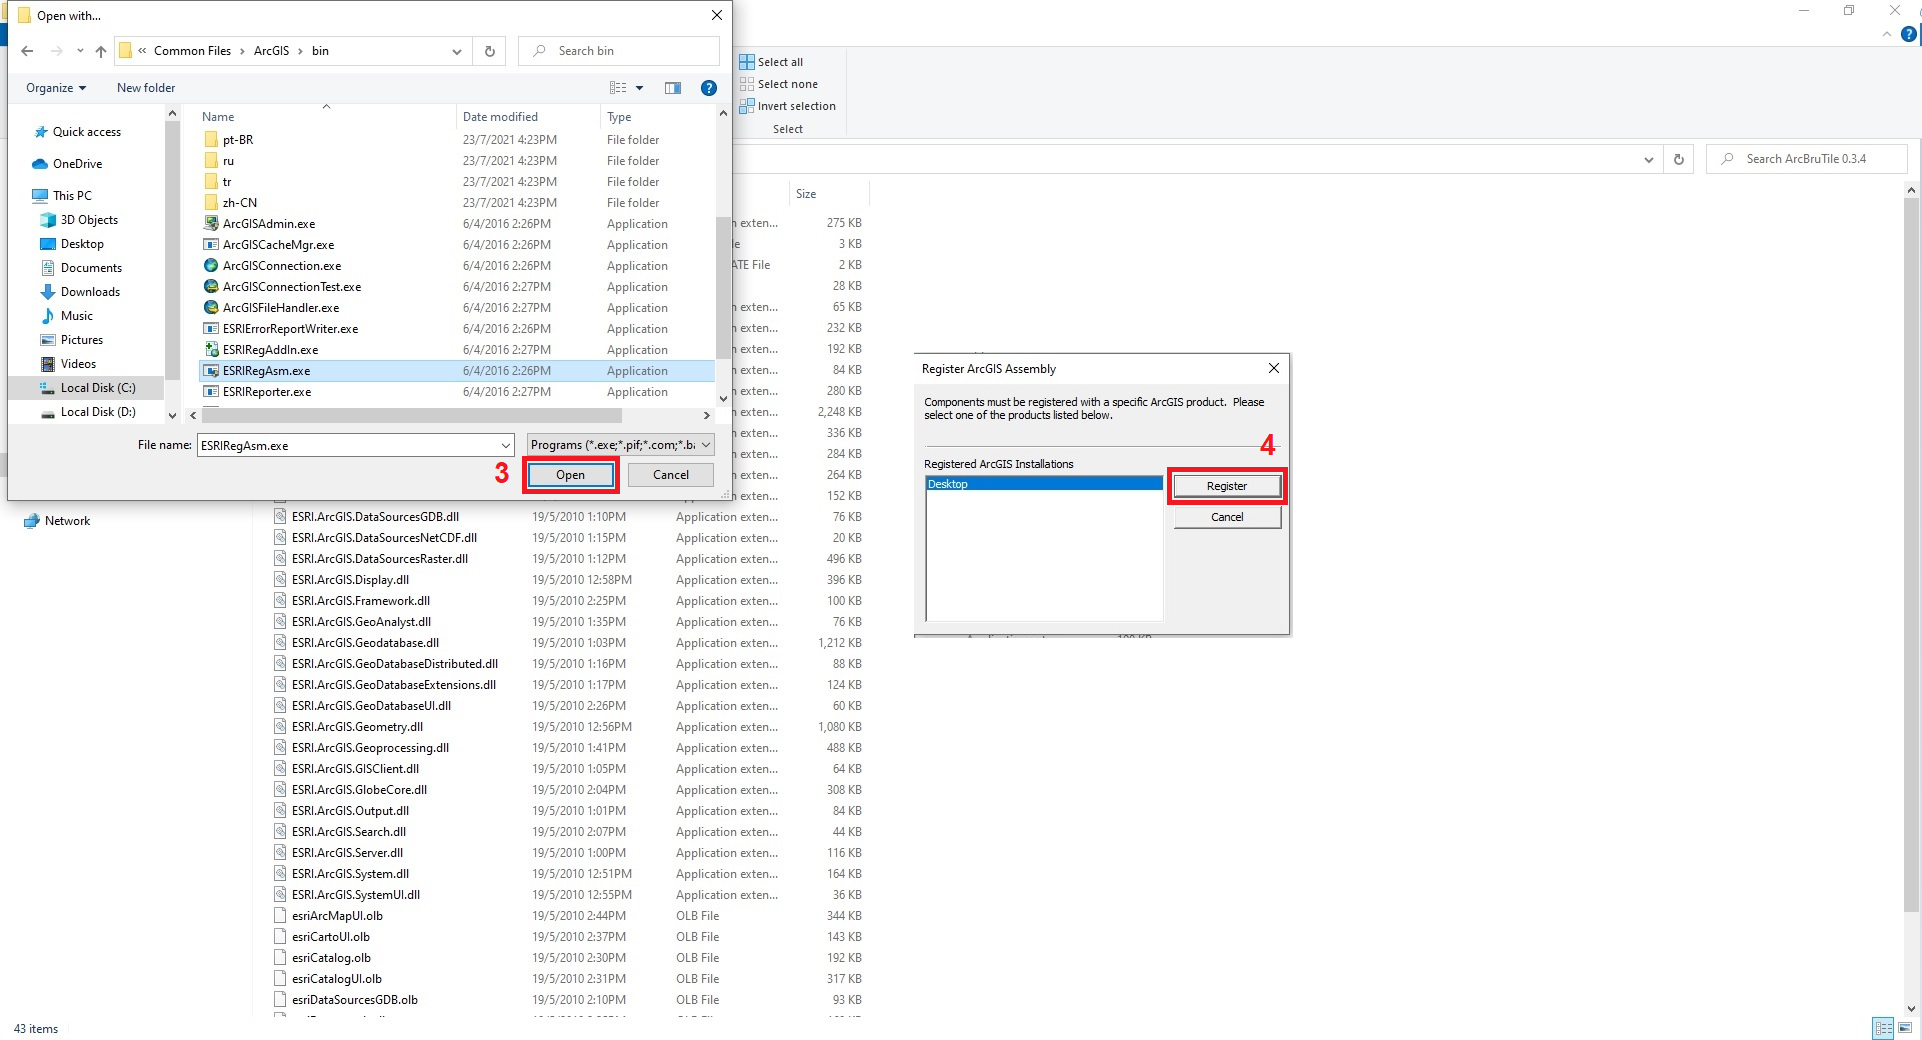
After completing the Figure 2, perform the following steps to remind ArcBruTile to ArcMap. To do this, select Local Disk (C) → Program Files → Code Plex → ArcBruTile 0.3.4 → ArcBruTile.dll (1) and right-click Open with → Local Disk (C) → Program File → Common Files → ArcGis → bin (2) (Figure 14a). Select the ESRIRegAsm.exe file in this bin folder and click the Open (3) button to open the Register ArcGIS Assembly window, and select Register (4) in this window (Figure 14b).
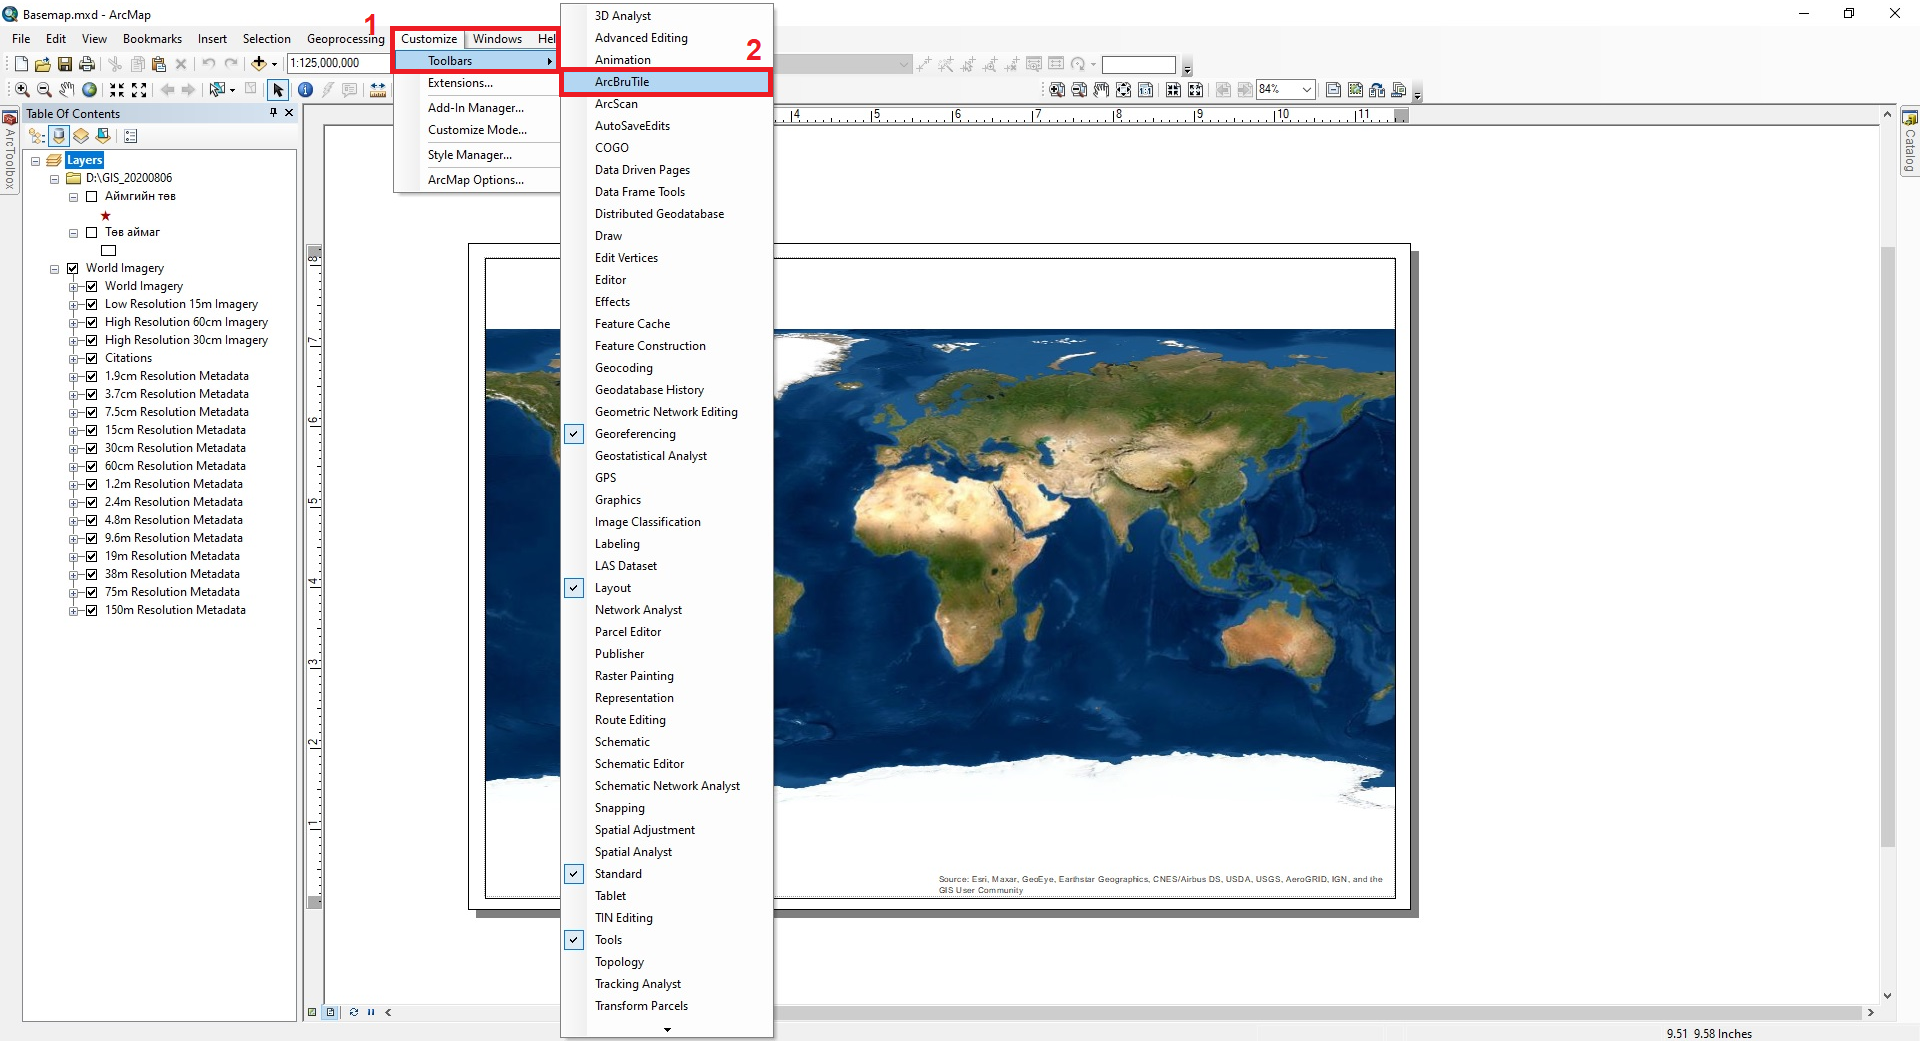
After that, the Toolbars (1) → ArcBruTile (2) tool in the Customize menu will be activated in ArcMap (Figure 15a). Thus, tools such as ArcBruTile, OpenStreetMap and Bing (3) are included with the command (Figure 15b).

Add the Add Basemap tool in the ArcMap
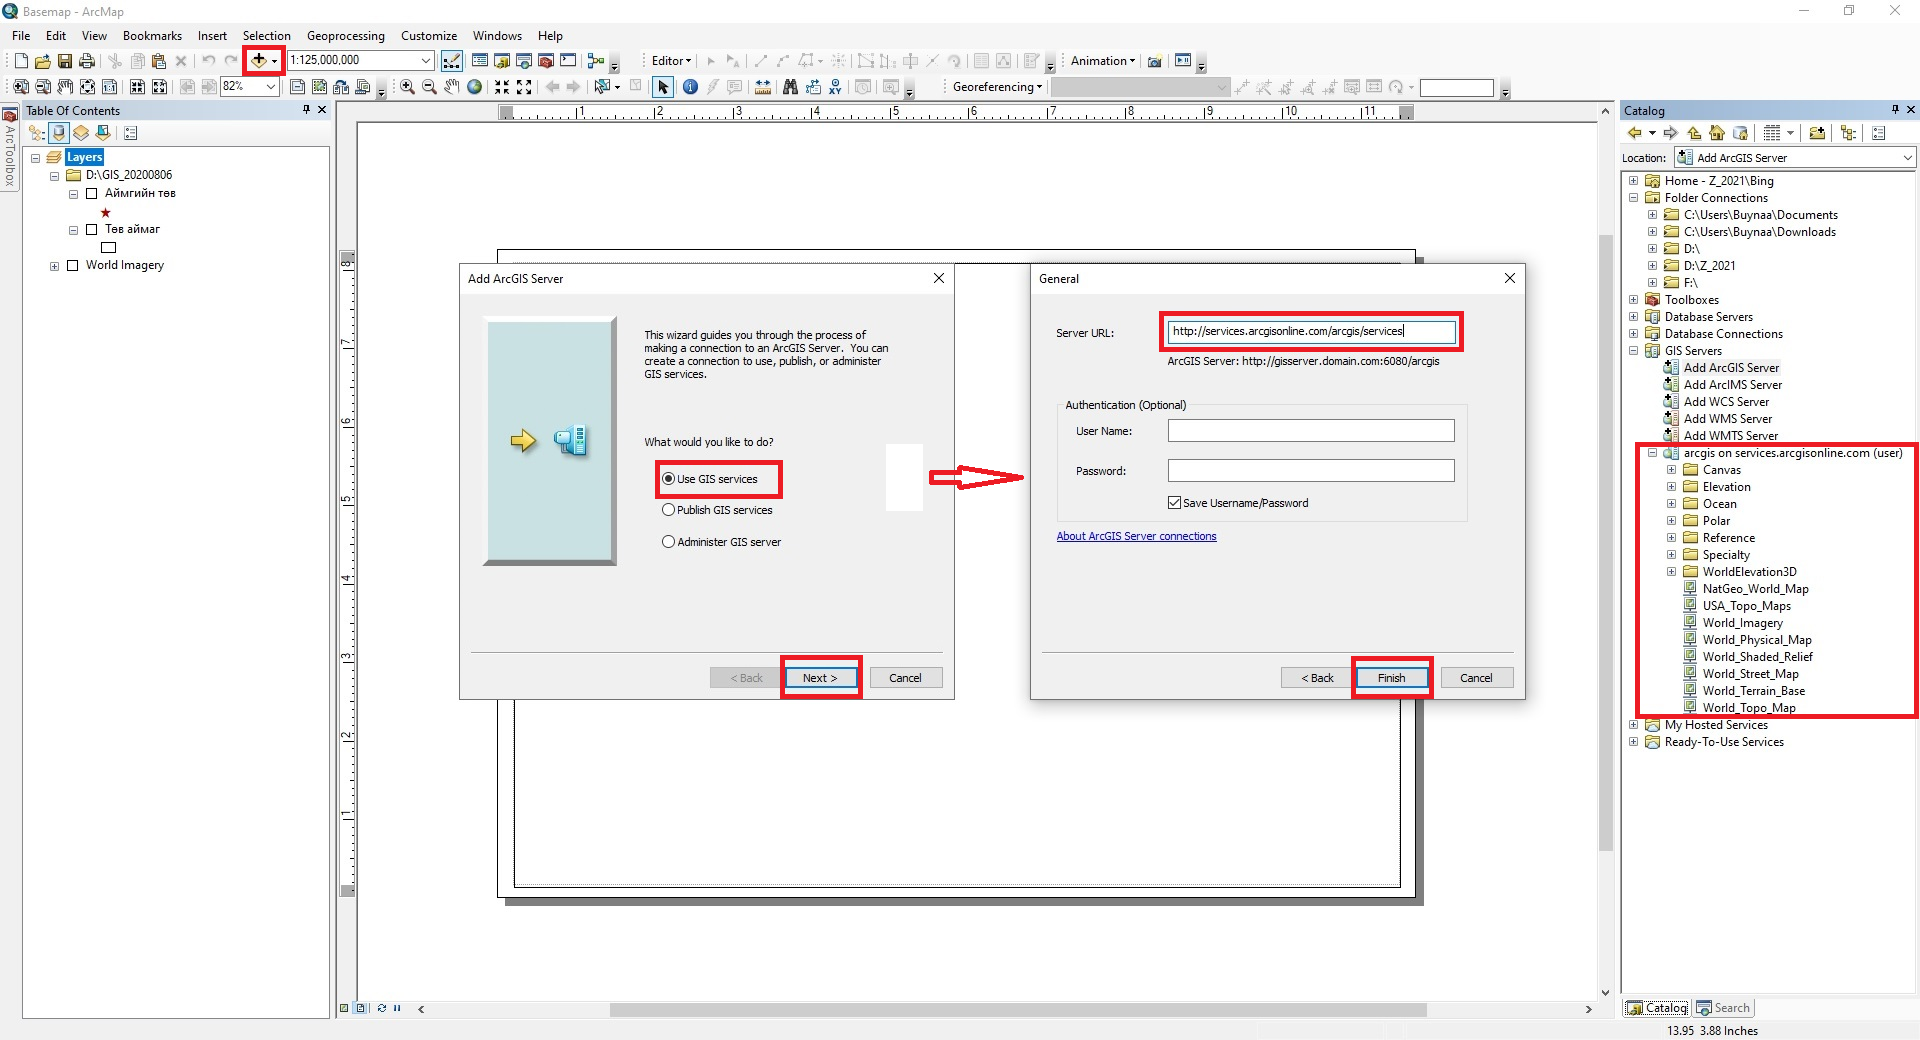
If the Add Basemap tool is not enabled in ArcMap, make the following settings. To do this, select Add ArcGIS Server in the GIS Servers menu of the ArcMap Catalog menu, activate the Use GIS services tool, and click Next. Then enter the Bing map link (http://services.arcgisonline.com/arcgis/services) in the Server URL: window and click Finish to display the new user imagery options arcgis on services.arcgisonline.com (user). From these imagery options, the user selects the imagery types (World Imagery, World Street Map, World Topo Map, etc.) (Figure 16).
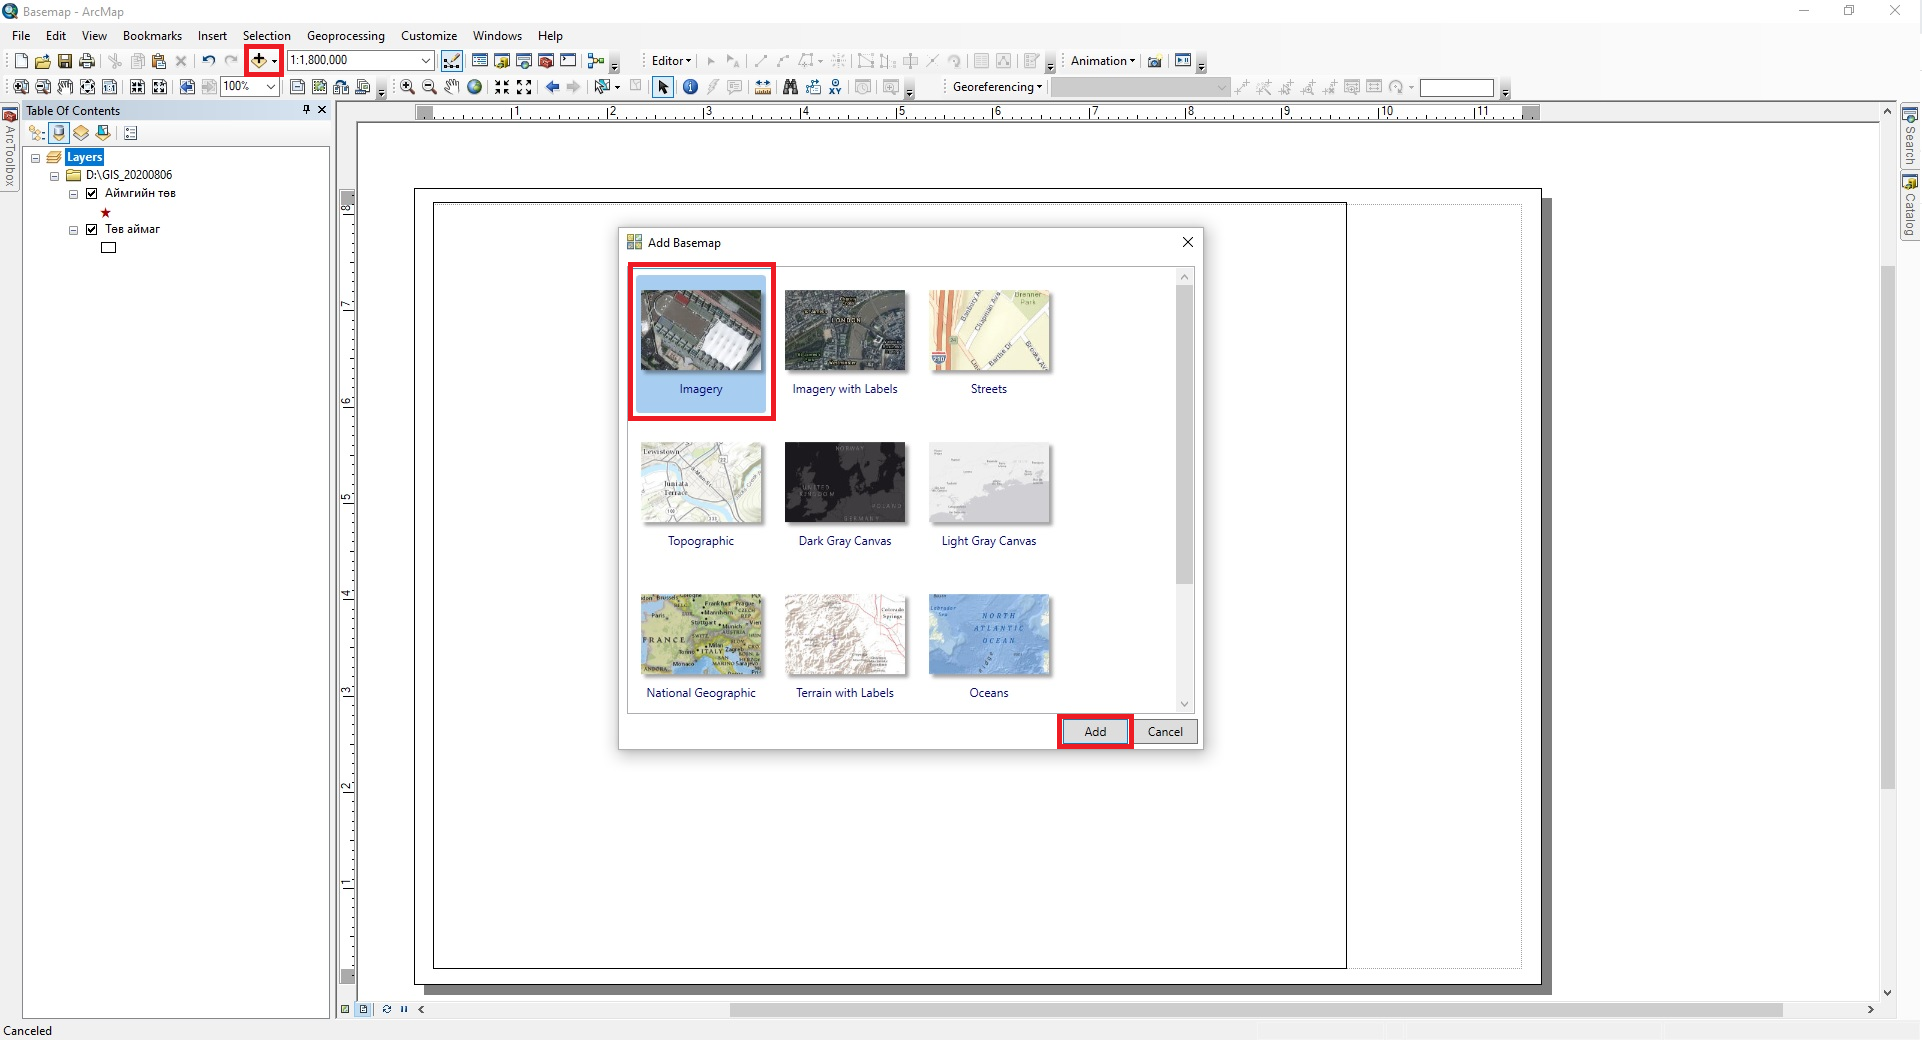
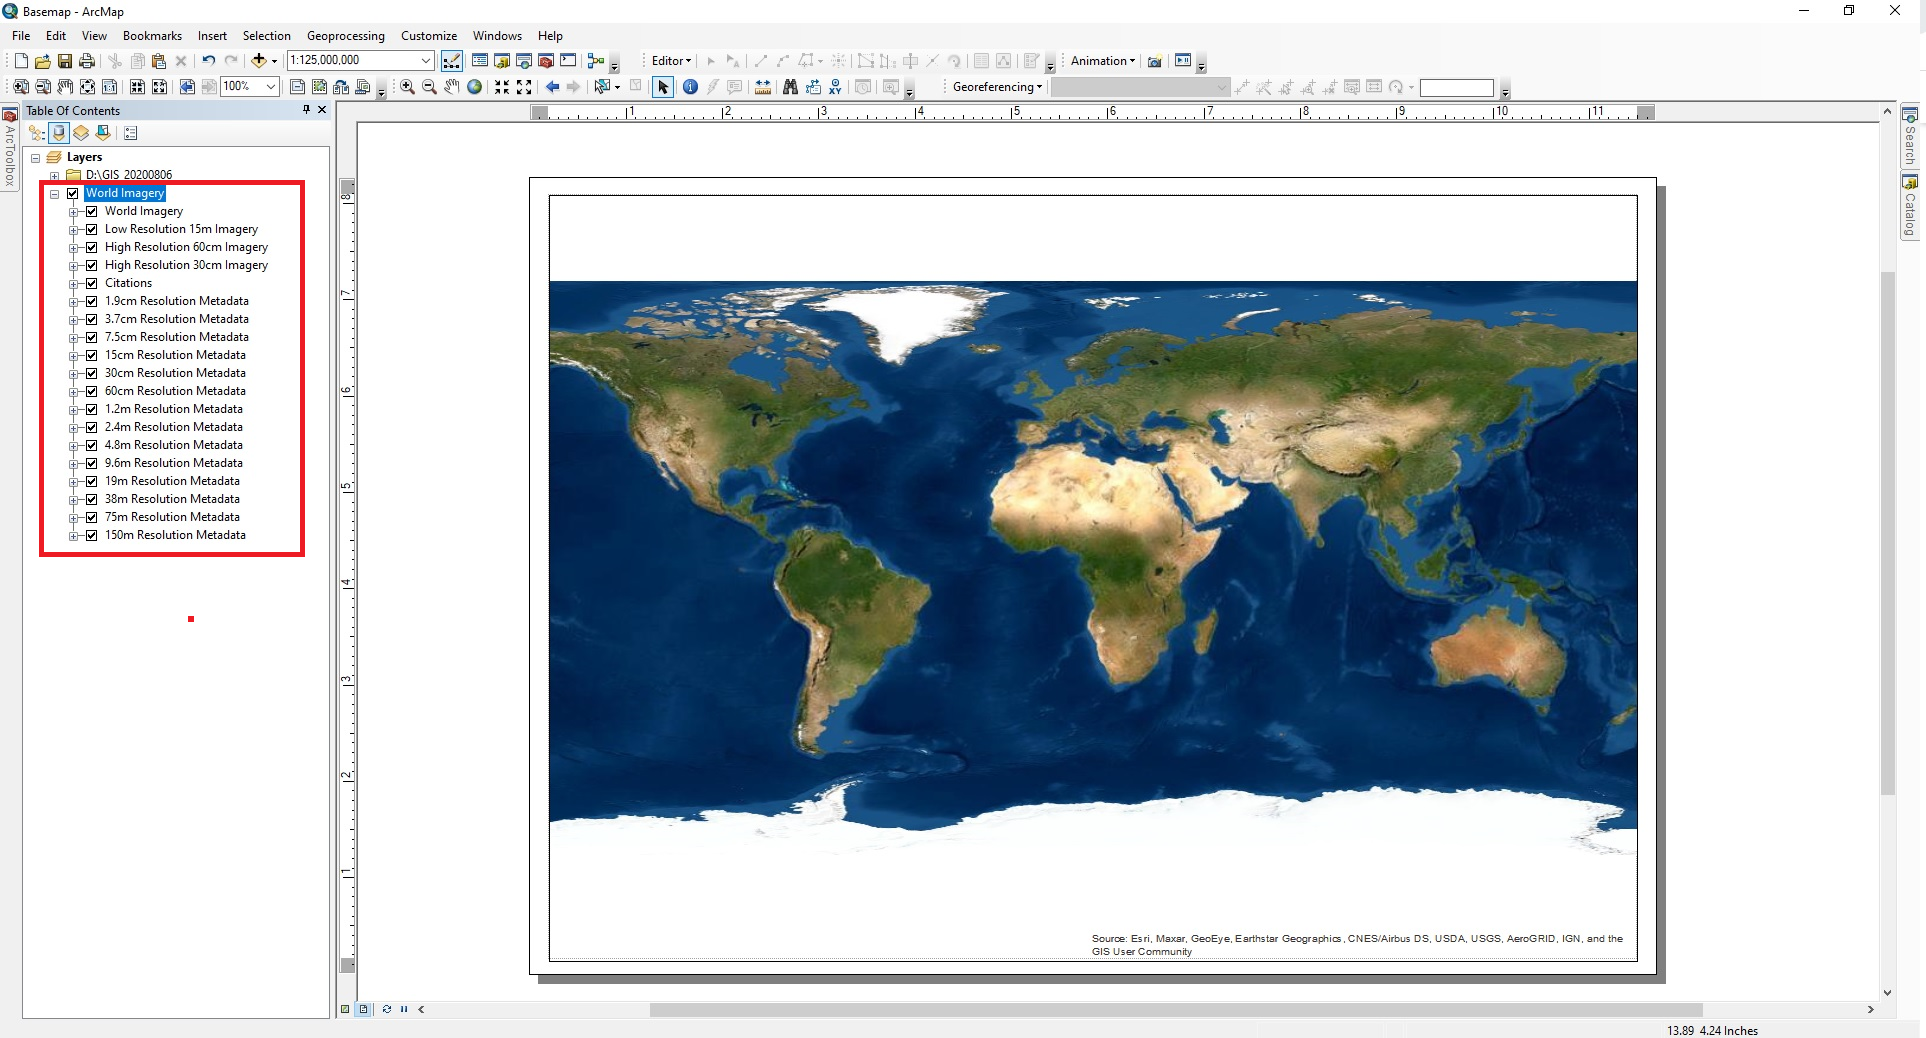
After adding the Add Basemap tool to ArcMap, the Add Data → Add Basemap tool from the File menu is activated. Then, when you open it, the Add Basemap window will open, select Imagery from this window and click the Add button (Figure 17a). After that, a world map will open on the ArcMap screen (Figure 17b).
Extract by mask of the study area
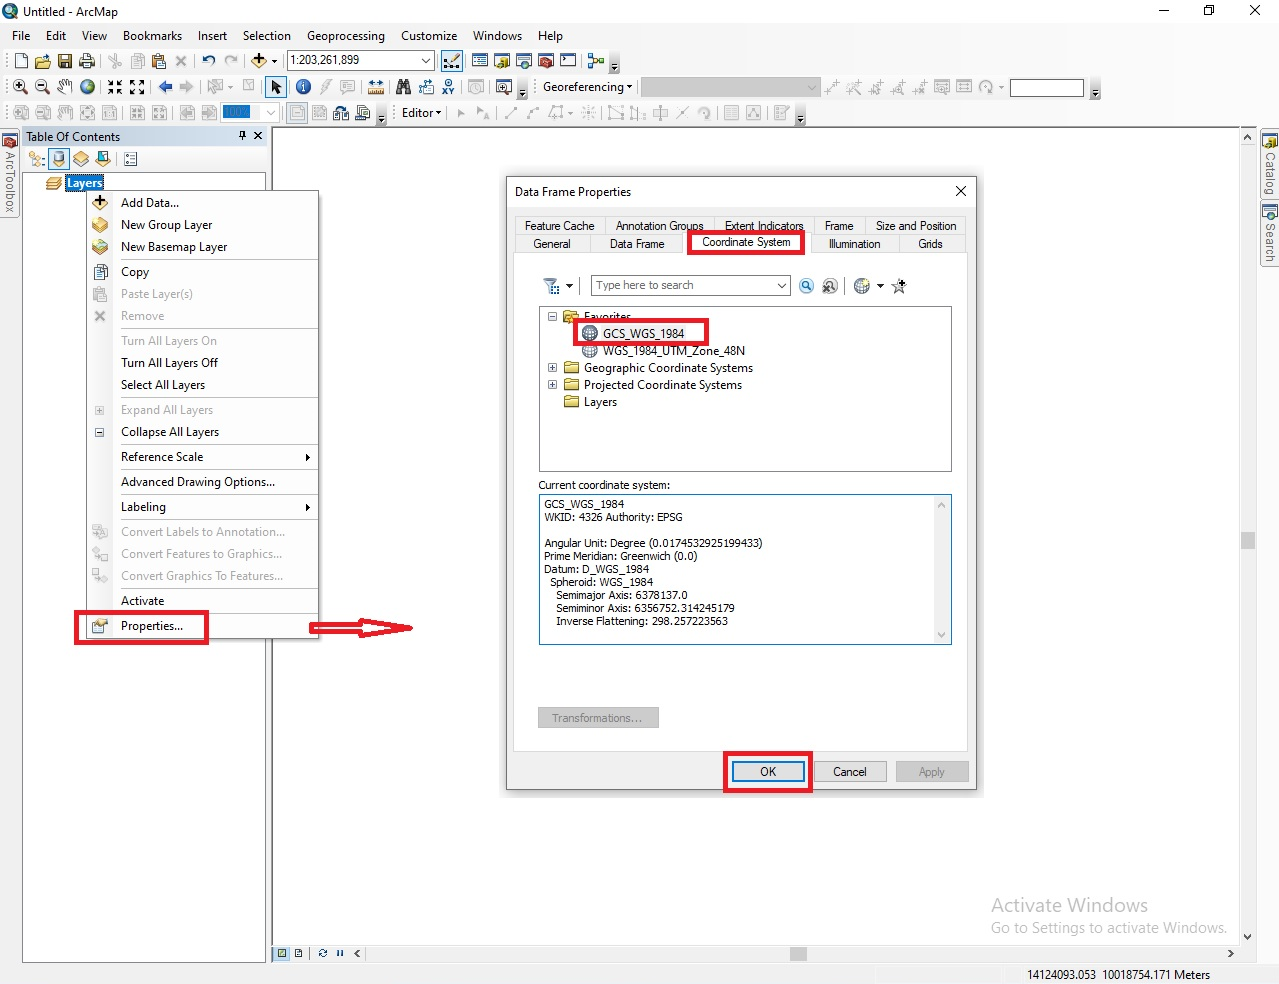
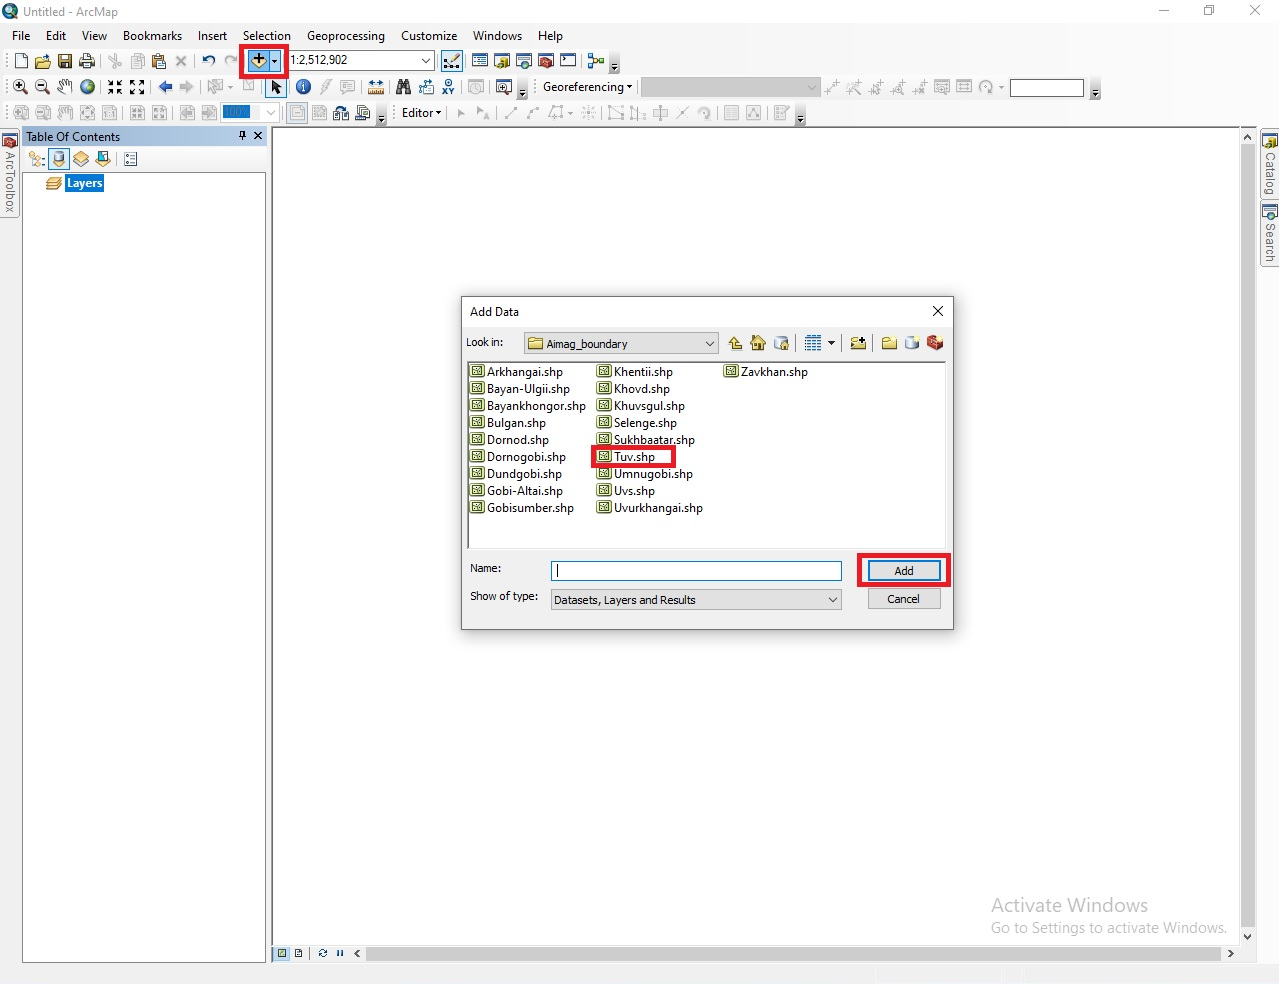
First, open the ArcMap program and right-click Properties of the Layers tool, select Data Frame Properties → Coordinate System → Favorites → GCS_WGS_1984 and click OK (Figure 18a). Then, from the Add Data tool, open the shape file (*.shp) of the boundary of the study area (province, soum etc.,) (Figure 18b).
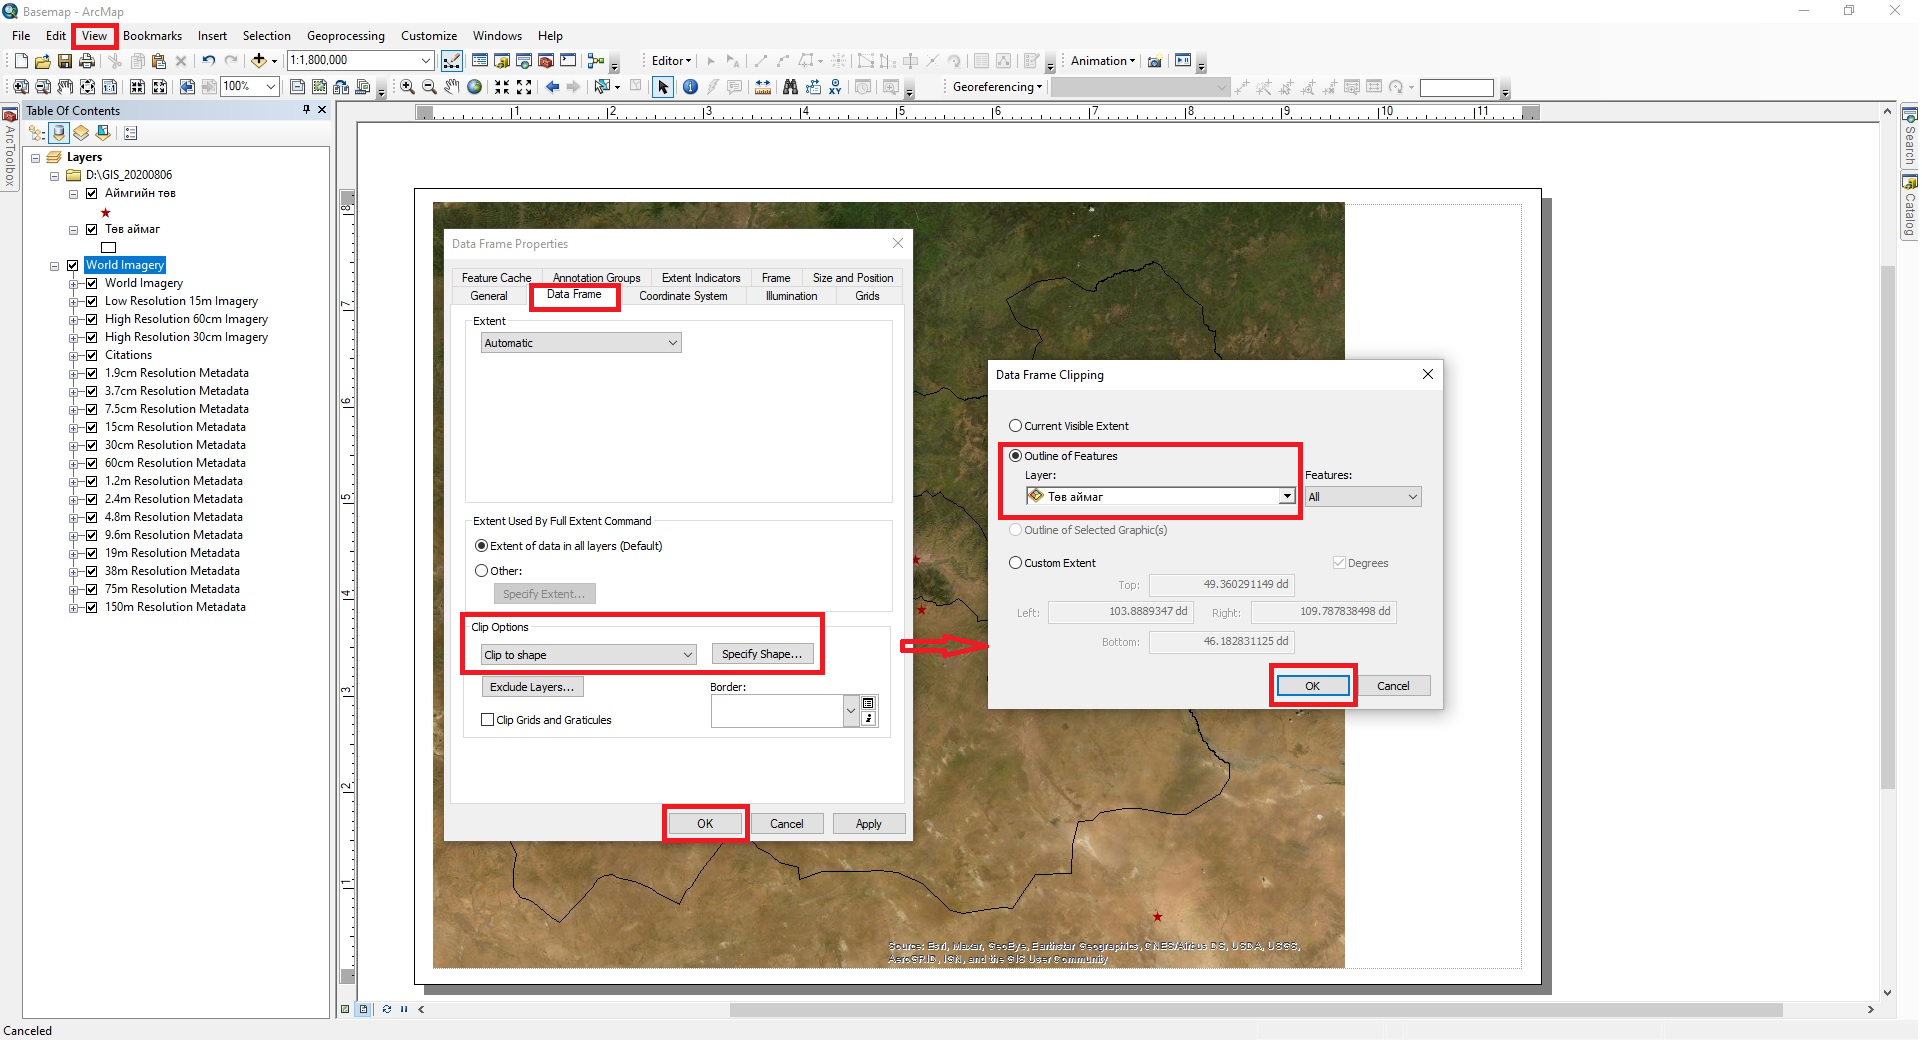
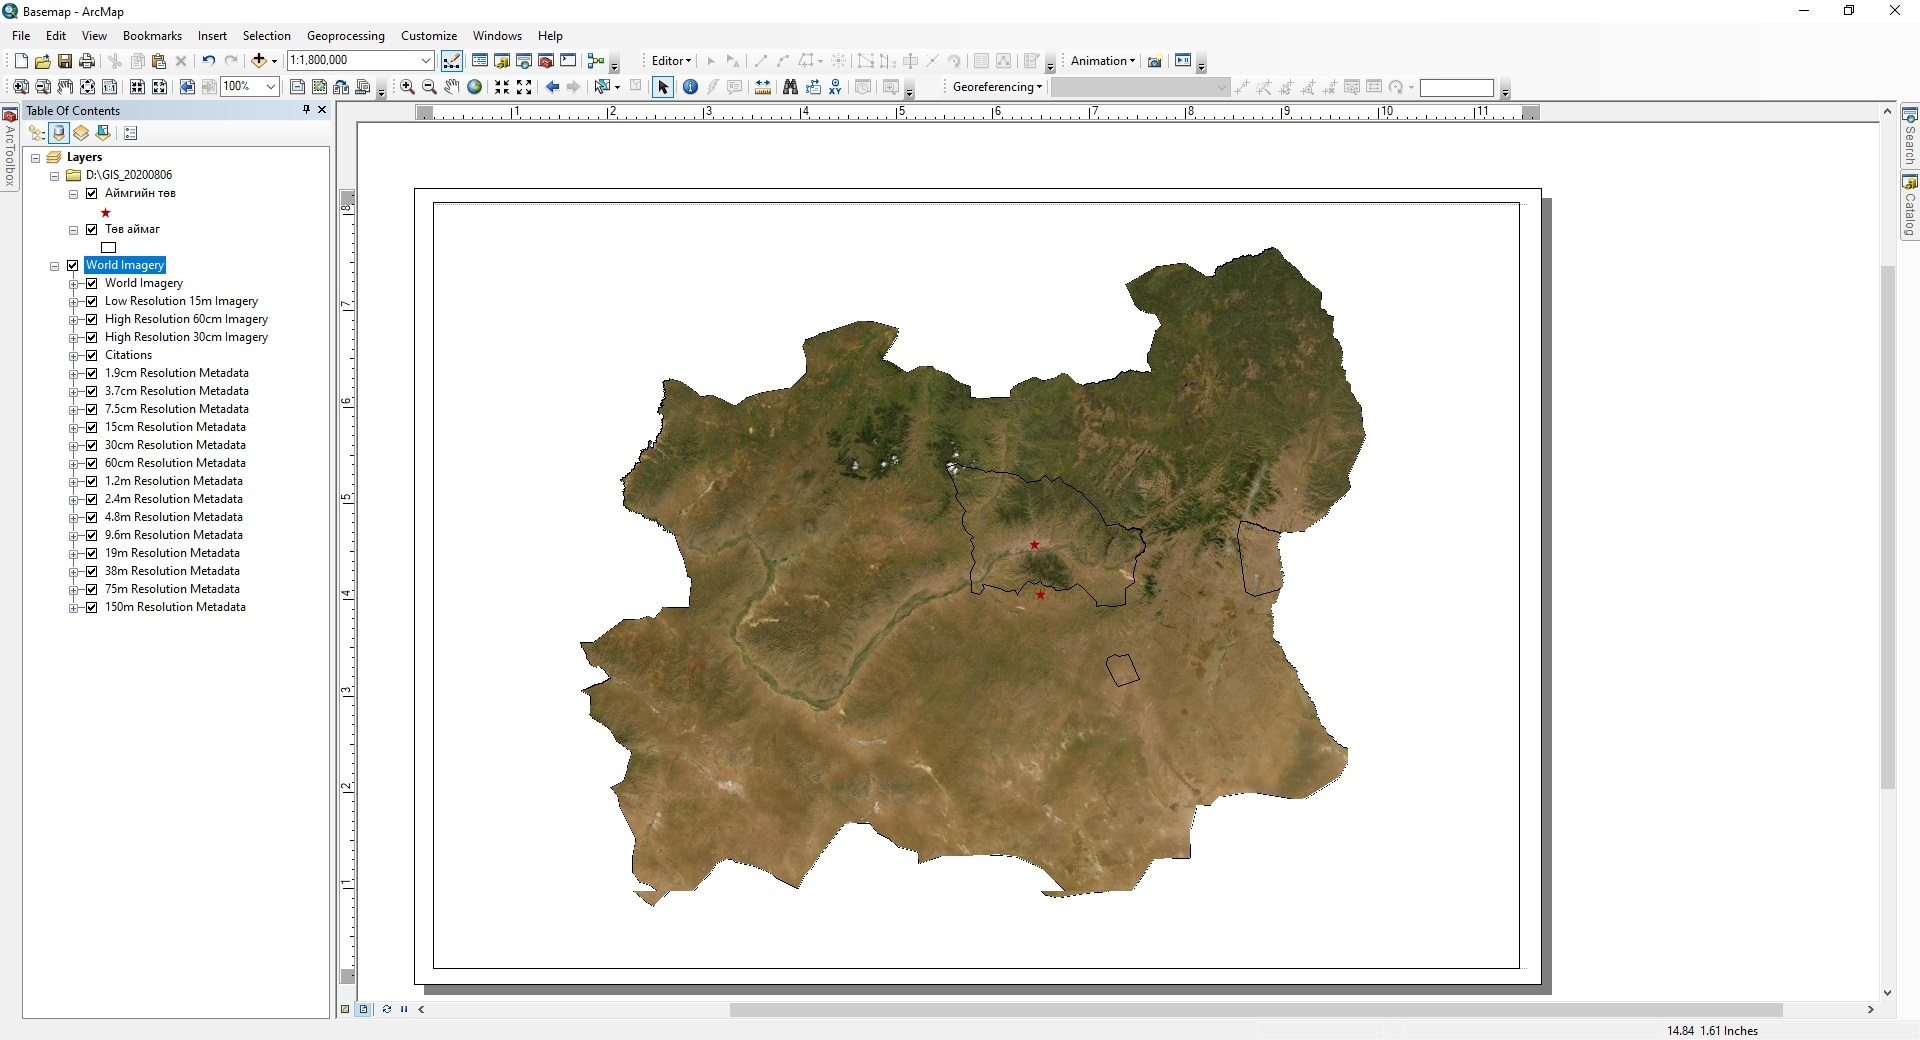
After opening the shape file of the study area, open the Add Data → Add Basemap, select Imagery and click the Add button (Figure 17a). Then select Clip to shape → Specify Shape from the Data Frame Properties → Data Frame → Clip Options tool in the View menu of ArcMap and click OK. Then a new Data Frame Clipping window will open, select the shape file of the selected area (.shp) from the Outline of Features → Layer menu and click OK (Figure 19a). Then draw a geographical projection using the Data Frame Properties → Coordinate System → Projected Coordinate Systems → UTM → WGS 1984 → Northern Hemisphere → WGS 1984 UTM Zone 48N from the View menu of ArcMap program (Figure 19b). Then, using the Export Data tool in the File menu, save the imagery output file of Tuv province in JPEG imagery format (.jpg).